How To Assemble Your Knafs Niños Knife Kit
Are you the proud new owner of a Niños Knife Kit? Are you looking at it and scratching your head thinking "where do I start on this thing?" Well, you've found the right place. This blog will teach you how to assemble your Niños Knife Kit like a seasoned professional!
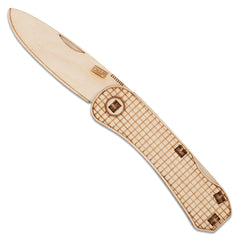

Not sure what a Niños Knife Kit is or how you even got here? Don't worry, amigo! The Niños Knife Kit is a perfect introduction to the world of pocket knives. These wood and plastic kits are made in Utah, and have no sharp edges or pointy pieces - meaning you can't get cut like a traditional steel bladed pocket knife.
Now that you are up to speed on this fun little kit, let's get to the important stuff. How do you build this thing?
Step 1
Pick pieces from the kit card and remove any excess material left from the connection points. Pro tip: If you have the 3D printed version some specialty nippers can be very handy.
Step 2
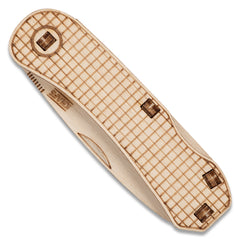
Once you have removed the knife parts from their respective attachments, take the 'show side' scale and place it face down so that the Knafs logo is against your working surface
Step 3
Insert each of the four pins into the show side scale
Step 4
With all the pins in place you can now assemble the blade, back lock, and backspacer/spring mechanism onto the knife. We have found that it's easiest to do add the backspacer/spring first, followed by the back lock, and finally the blade.

Pro tip: Apply inward pressure to the spring via the back lock to make it easy to seat your blade in the handle
Step 5
All that's left at this point is to put the top slice of bread on that tasty PB&J. Take your remaining scale and place it on the exposed pins, locking the blade and mechanism into place.
That's all there is to it! You now have a fully functioning Niños Knife Kit that simply won't cut anything!